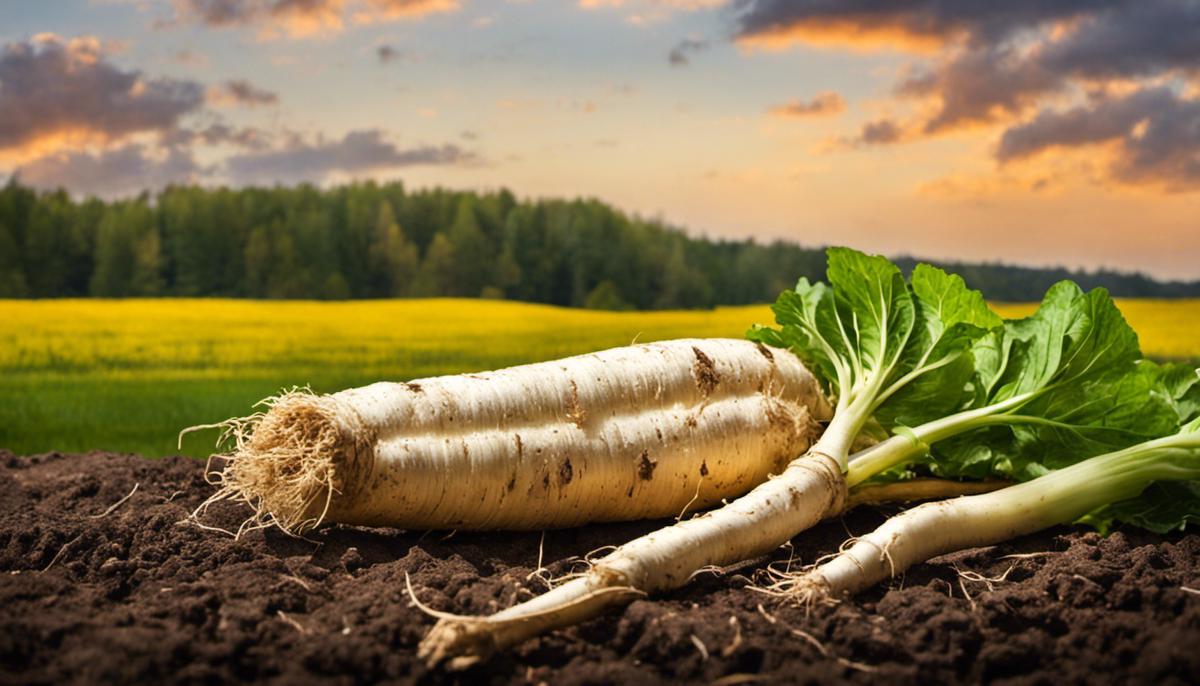
Horseradish, a vigorous, hardy perennial, is an interesting addition to any home garden. With its robust taste and versatile uses, it’s no surprise that many people are taking an interest in cultivating their own horseradish. In this piece, we’ll first delve into understanding the essential growth requirements of this root vegetable, setting the stage for a successful growing experience. Following that, we’ll guide you on how to prep store-bought horseradish roots – an accessible but often overlooked starting point for home growers. Finally, we will outline the planting process and the subsequent care required to ensure a healthy and thriving plant. Let’s embark on this intriguing journey, one that takes us from grocery store to home harvest!
Understanding Horseradish Growth Requirements
Gathering the Necessary Materials and Conditions
Materials: Horseradish roots from a store, pot or garden plot, nutrient-dense potting soil mix, trowel, and a watering can
Before planting, it’s crucial to understand the growing conditions required for horseradish. Horseradish plants prefer a full sun or partial shade exposure. A spot that receives direct sunlight for at least six hours each day is ideal. In terms of temperature, horseradish can survive in colder climates as long as the ground is not frozen. Horseradish does well in temperatures ranging from 40°F (4°C) to 75°F (24°C).
The growth of horseradish is also largely dependent on the soil conditions. The plants prefer well-draining, loamy or sandy soil with a pH level between 6.0 and 7.5. Water requirements for horseradish are moderate/not excessive. Supply enough water to keep the soil consistently moist, but not waterlogged.
Preparing the Planting Area
Step one: Choose either a pot or a spot in your garden plot for the horseradish. If using a pot, make sure it has drainage holes to prevent water from accumulating at the bottom. If you are planting directly in the ground, make sure the area is clear of other plants and debris.
Step two: Fill the pot or prepare the ground with nutrient-dense potting soil mix. Ensure the soil is loose and well-drained to make room for the roots to expand easily.
Planting the Horseradish
Step three: Plant the store-bought horseradish root cuttings into the prepared soil. Make a hole about 4-6 inches deep with the trowel, place the root cutting into the hole diagonally with the top of the root (the narrower end) pointing upwards, then cover it with soil. Ensure that the top of the root is 2 inches below the soil surface. If planting multiple roots, maintain a distance of about 30 inches between each.
Step four: Water the newly planted root cuttings thoroughly. But be careful not to waterlog the soil.
Caring for the Horseradish
Step five: Water the horseradish plants sufficiently to keep the soil consistently moist, but avoid overwatering. Excessive water can lead to the roots rotting.
Step six: Monitor the growth of the horseradish plants regularly. Once the plants establish themselves (after around 2 weeks), you can cut back on the water, as horseradish tolerates drier conditions fairly well.
Remember, growing horseradish from store-bought roots requires patience and care, but in about a year, you should be able to harvest your very own fresh horseradish.

Prepping Store Bought Roots
Preparing Store-Bought Horseradish Roots For Planting
Materials: Store-bought horseradish roots, a pair of sharp and clean pruning shears, a bowl of water, gardening gloves, potting soil, and planter (optional).
Step one: Begin by selecting healthy horseradish roots from the store. These should be thick, firm to the touch, and free of visible diseases or pests.
Step two: Using your clean, sharp pruning shears, trim off any damaged areas from your horseradish root. Remove any remaining leaves or green parts, as these may rot in the soil and cause diseases.
Step three: Next, soak your trimmed horseradish roots in a bowl of water. Leave them to soak for approximately 12 hours. This is to hydrate the roots and prepare them for planting.
Step four: While the roots are soaking, prepare your planting area. Horseradish prefer well-drained yet moist soil. They also love full sun but can tolerate part shade. Hence, choose a sunny spot in your garden with well-draining soil. If growing in a container, use good quality potting mix.
Step five: After soaking, remove your horseradish roots from the water and let them dry for about an hour.
Step six: Ready your gloved hands and dig a hole about four to six inches deep. Plant your prepared store-bought horseradish root into the hole with the larger end of the root in the soil and the narrower end pointing upwards.
Step seven: Backfill the hole with soil, firming it gently around the root. Make sure the top of the root (the sprouting end) is about two inches beneath the soil surface.
Step eight: Water the newly planted horseradish root thoroughly. Continue to water regularly, but do not allow the soil to become waterlogged, as this may rot the root.
This is how to properly prepare and plant your store-bought horseradish roots. With proper care, your horseradish plants should sprout in a few weeks and be ready to harvest after about a year.

Planting and Care
Buying and Preparing the Root
Start by purchasing a horseradish root from a local grocery store or farmers market. Opt for one that’s firm and looks fresh without any sort of decay, soft spots, or discoloration.
Choosing the Right Site
Choose a spot in your garden where the soil drains well. Horseradish enjoys a full sun to part-shade location. The plant can become invasive, so select a spot where this won’t become an issue or plant in a deep container.
Planting the Horseradish
The best time to plant horseradish is in the early Spring. You’ll want to cut the root into 4-5 inch long pieces and plant each piece vertically into the ground with the broader end up. Each piece should be planted about three feet apart to give the plants ample space to grow. The planting depth should be 12-18 inches deep.
Watering
Water the newly planted sections immediately. After that, maintain a regular watering schedule, ensuring the soil remains consistently moist, but not drenched. Depending on your climate, this may mean watering daily or only a few days a week.
Feeding
Fertilize horseradish with a balanced, all-purpose plant food. Feed your plants once a month during the growing season following package instructions for the correct amount.
Weeding and Maintenance
Keep the area around the plants weed-free as the horseradish grows. Regular weeding helps ensure the plant’s nutrients aren’t compromised.
Pest and Disease Prevention
Though horseradish is usually pretty resilient to pests and diseases, maintaining the health of your plant with regular watering and feeding will help prevent potential issues. If you notice any significant changes in your plant, such as yellowing leaves or stunted growth, seek advice from a local nursery or your county’s extension service.
Harvesting
After the first hard frost in the fall, you can dig up your horseradish. The root should be harvested by gently pulling it from the ground, taking care not to break off any side roots that may be growing. Allow the root to dry in a cool, dark place for a couple of days, then process or store it.

Embarking on the journey of growing horseradish can be exciting and rewarding. Your store-bought horseradish roots, once prepped and implanted in the right conditions, can flourish beautifully. Like any gardening endeavor, this one requires a keen understanding of the plant’s needs, patience, and regular care. The joy of seeing your horseradish grow, however, makes it all worthwhile! Not only will you learn about a new plant, its growth, and care, but you will also enjoy the fruits of your hard work in the form of fresh, homegrown horseradish. Here’s to enriching your home gardening experiences and to the wonderful dishes you’ll make with your new crop!


